Can You Put Wallpaper Over Wallpaper? A Helpful Neighbor’s Guide
It’s a question we hear a lot in our showrooms, from families in Galax all the way to Hillsville. The short answer is yes, you can put wallpaper over wallpaper, but it’s a shortcut that works only if the conditions in your home are absolutely perfect. Pulling it off can save you a ton of time, but it’s definitely not the right choice for every wall.
When To Layer Wallpaper and When To Strip It
Deciding whether to layer new wallpaper or strip the old stuff off is probably the most critical first step you'll take. Getting this right from the start means your new accent wall will have a solid, smooth foundation for a beautiful, long-lasting finish.
Think of it like building a house—you wouldn't put up walls on shaky ground. The same principle applies here.
Making the right call now saves you time and frees up your budget for the fun part, like finding the perfect Bassett dining set or that cozy La-Z-Boy recliner to complete the room. We've been helping families in Southwestern Virginia and Northern North Carolina make their homes comfortable since 1902, and we know a good foundation is everything.
Inspecting Your Current Walls
The key is to carefully inspect your existing wallpaper. You're looking for tell-tale signs that your wall is a good candidate for layering. A perfect candidate has only one existing layer of wallpaper that is smooth, completely flat, and stuck fast to the wall everywhere. Vinyl wallpaper is often a great base because it's durable and not very porous.
However, there are also some major red flags to watch for. If you see any of the following, you’ll need to strip the old paper first:
- Peeling Seams or Bubbles: Any lifting means the original adhesive is failing. Covering it will just trap the problem and cause the new layer to fail, too.
- Textured or Embossed Surfaces: Wallpaper with any kind of texture, like flocking or raised patterns, will show right through the new layer and create an uneven, lumpy finish.
- Multiple Existing Layers: Adding a third or fourth layer is just too heavy for the wall and almost guarantees it will all start peeling down the road.
This quick decision tree helps visualize whether your wall is ready for a new layer or needs a fresh start.
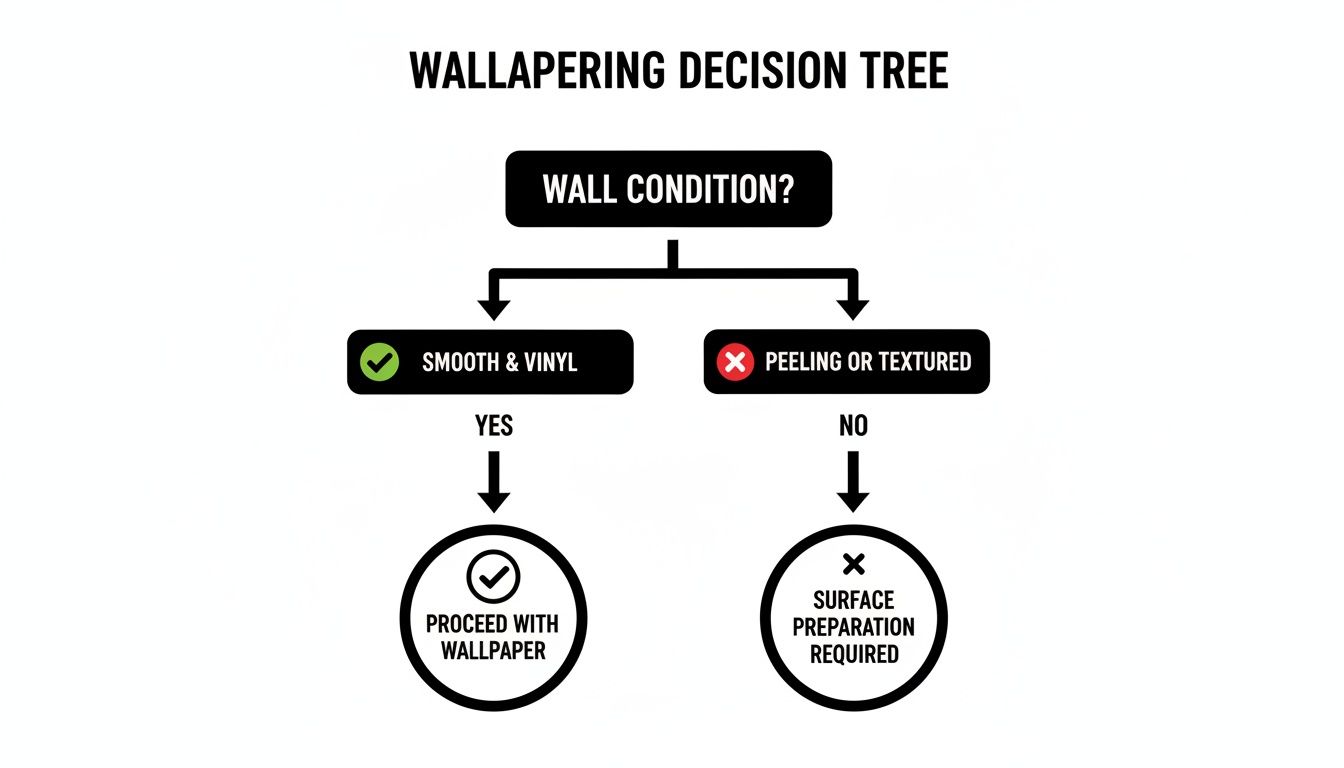
As the visual shows, a smooth, firmly attached vinyl surface is a green light, while textured or peeling paper means it's time to strip it.
For more inspiration on transforming your space, you can explore our guide on how to add color to your home without painting, which offers other fantastic ideas for a room refresh.
The Real Benefits of Layering Wallpaper
For many families here in Southwestern Virginia, from Galax to Hillsville, any home project is a careful balance of time, budget, and sheer effort. We understand that projects can feel overwhelming. When the conditions are right, choosing to wallpaper over an existing layer can be a real game-changer. It’s a practical shortcut that turns a potentially messy, week-long project into a quick weekend refresh.
The biggest win is the time you'll save. Instead of spending days scraping, soaking, and patching up your walls, you can jump right to the exciting part—adding your beautiful new wallpaper. Imagine having that brand-new Ashley accent wall finished by Sunday evening, with your new La-Z-Boy recliner already settled in front of it. This isn't just about saving a few hours; it's about getting back to enjoying your home with your family that much faster.
Saving Time and Avoiding Hidden Costs
Stripping old wallpaper can quickly spiral into a much bigger job than you bargained for. Data shows that many DIY wallpaper removal projects average a grueling 15-20 hours. Worse, a shocking 42% of them lead to wall damage that can cost an extra $500-$1,200 in repairs.
In contrast, wallpapering over an existing layer can slash project time by up to 70% and cut costs by 40-50%, making it an incredibly efficient, budget-friendly alternative. You can dig into more of these time-saving stats over at peelandpaper.com.
This method offers a cleaner, less disruptive way to update your space, which is a lifesaver for busy households. You avoid the dust and mess from stripping and sanding, and you completely sidestep the potential costs of patching up drywall.
Our Helpful Neighbor Tip: A major, often overlooked, benefit is preserving the integrity of your walls. This is especially true in the beautiful older homes found throughout our region, where plaster walls can be fragile. Layering avoids the risk of gouges and tears, ensuring a smooth, professional-looking result.
Achieving a High-End Look Without the Hassle
Ultimately, layering wallpaper lets you achieve a polished, high-end look without the matching high-end hassle and expense. It aligns perfectly with our Low Price Promise—we want you to get the best value, and sometimes that means making a smart choice during your prep work.
You can create a stunning new look for a room in a fraction of the time. That leaves you more of your budget for the furniture that will truly complete your vision. If you’re planning an accent wall, our guide on how to create a perfectly balanced accent wall has some great ideas to get you started.
How to Properly Wallpaper Over an Old Layer
Ready to get started? Once you've decided layering is the right move for your room, getting that professional-looking finish is all about the prep work. We’ll walk you through the process with the same friendly, no-pressure advice you’d get in our showrooms, whether you're in Galax, Independence, or anywhere in our Southwestern Virginia home.
Think of this as your hands-on guide to getting it done right.
It all begins with creating the perfect canvas. A flawless result depends entirely on what’s underneath, so taking your time here is the best investment you can make in your project.
Step-by-Step Wall Preparation
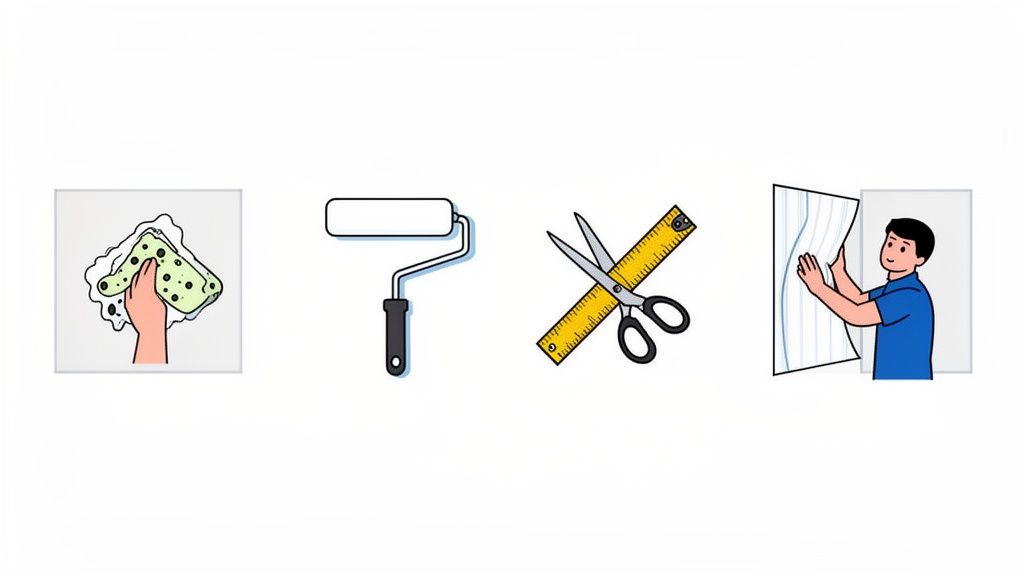
First things first, give the existing wallpaper a gentle but thorough cleaning. A simple solution of mild soap and water on a soft sponge is usually all you need to get rid of any dust or grime that’s built up over the years. This step is critical—it ensures the primer and new adhesive will actually stick.
Next up, it’s time to play detective and fix any minor flaws. Even the slightest imperfection can telegraph right through a new layer of wallpaper.
Here’s what to look for:
- Loose Seams: Got lifting edges? Carefully apply a small amount of wallpaper seam adhesive underneath and press them down firmly with a seam roller.
- Small Bubbles: Use a utility knife to make a tiny slit in any bubbles, then gently press the air out. A syringe is perfect for injecting a tiny bit of adhesive before smoothing it flat.
- Nail Holes or Dents: Fill these with a small dab of spackling compound. Once it's completely dry, lightly sand it until it's perfectly smooth to the touch.
After you've made these repairs, let everything dry completely before you even think about the next step.
Priming Your Walls for Success
Skipping primer is one of the most common—and costly—mistakes we see. Applying a high-quality primer is non-negotiable because it does two critical jobs.
First, it seals the old wallpaper, which prevents moisture from the new wallpaper paste from soaking through and reactivating the old adhesive. This is what stops the old paper from bubbling up or peeling right off the wall, taking your new paper with it.
Second, primer creates a uniform, properly prepared surface for your new wallpaper's adhesive to grip onto. This ensures a strong, long-lasting bond.
Our Helpful Neighbor Tip: For the best results, we always recommend a shellac-based or oil-based stain-blocking primer. These primers aren't water-based, so there is zero risk of them causing the old paper to swell or loosen. As a bonus, they also block any old patterns or dark colors from bleeding through your beautiful new wallpaper.
Just apply a single, even coat over the entire surface and let it cure completely according to the manufacturer's directions. This little step makes all the difference.
Hanging Your New Wallpaper
With your walls prepped and primed, the fun can finally begin. Start by measuring your wall height and adding about four extra inches to your wallpaper strip—this gives you a little wiggle room at the top and bottom for a perfect trim.
If your wallpaper has a pattern, lay your second strip next to the first on the floor to match the design perfectly before you cut it. This prevents any frustrating surprises once you've got paste on the back. Apply your wallpaper paste evenly from the center out to the edges, then "book" the paper by gently folding the pasted sides together. Let it rest for the time specified in the instructions.
When you hang that first piece, use a level to make sure it's perfectly straight. This strip will be your guide for the entire room. Smooth the paper onto the wall with a wallpaper brush, working from the center outward to push out any air bubbles. Trim the excess at the ceiling and baseboard with a sharp utility knife for a crisp, clean line.
Repeat the process for each new strip, making sure the seams are tight and the pattern stays aligned. It’s this careful, methodical process that lies at the heart of any successful room transformation.
If you're feeling a bit overwhelmed by the details, our guide on how to start the interior design process for a room can help you zoom out and plan your project from a broader perspective.
Common Mistakes to Avoid When Layering Wallpaper
Every DIY project has its share of "if only I'd known" moments, and layering wallpaper is certainly no exception. Getting ahead of the common slip-ups can save you a ton of frustration and make sure your hard work pays off with a beautiful, lasting finish. After all, you want your home to be a source of pride, not a project you regret.
The most common misstep we see is trying to ignore minor imperfections on the existing paper. That tiny bubble or slightly lifted seam might not look like much, but those little flaws will absolutely telegraph through your new wallpaper. You'll end up with subtle bumps and shadows that cheapen the final look. It’s worth the extra time to fix and smooth every single spot before you even think about unrolling the new paper.
Another huge mistake is applying fresh wallpaper over a compromised surface. Always give your walls a thorough inspection first. Learning to identify signs of water damage in walls is critical, as layering over moisture issues is just asking for peeling and mold down the road. You need to ensure your beautiful new wall has a healthy, solid foundation.
Pattern Bleed-Through and Layer Overload
Ever heard of "ghosting"? It's what happens when a dark or bold pattern on the old wallpaper subtly shows through your new, lighter-colored paper. You might not notice it right away, but in bright light, you'll see a faint, shadowy effect. The fix is simple but absolutely essential: use a high-quality, stain-blocking primer to create a neutral, opaque canvas to work on.
And here’s a golden rule: never wallpaper over more than one existing layer. While durability is a big question for most homeowners, the numbers are actually pretty reassuring. A properly applied wallpaper overlay can last 12-18 years—nearly as long as paper on a fresh wall.
However, there's a reason 58% of professionals stick to a strict one-layer-only rule. Adding a second, third, or fourth layer increases the risk of peeling by a whopping 35%.
The sheer weight of multiple layers puts too much stress on the original adhesive and the drywall itself, which can lead to widespread failure. Sticking to just one overlay ensures a secure bond that will stand the test of time.
Mismatched Patterns and Seams
Finally, don't get so focused on smoothing out bubbles that you forget about pattern matching. When patterns don't align perfectly, it can throw the whole wall off-kilter. It's an easy mistake to make when you're in the zone, trying to get the paper straight and smooth.
If you're looking for some great tips on getting different designs to play nicely together, check out our guide on how to mix and match patterns for a balanced look. It’ll help you create a cohesive design that looks intentional, not accidental.
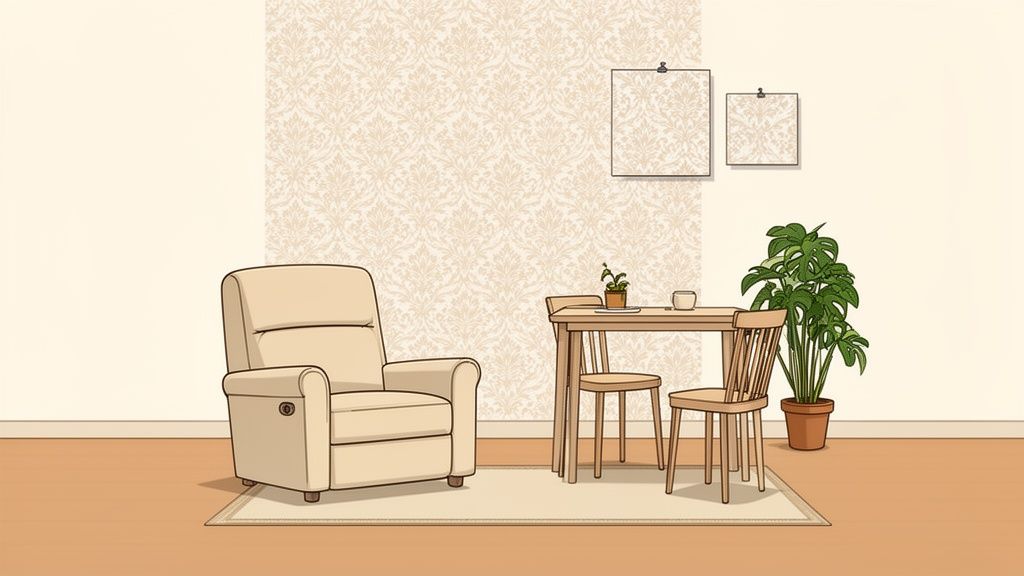
Designing Your Room Around Your New Walls
With your walls beautifully refreshed, the real fun begins. A new wall treatment is the perfect canvas for bringing your dream room to life, turning a simple DIY project into a complete transformation for your home here in the Southwestern Virginia and Northern North Carolina region.
Our design expert, Debra Williams, often advises clients from Independence and the surrounding areas on how to use a new accent wall to anchor a room's entire design. The right wallpaper can perfectly complement the timeless comfort of our La-Z-Boy Showcase pieces or enhance the modern farmhouse style of Ashley furniture.
Building Your Vision from the Walls Out
Think of your new wallpaper as the starting point for your room's color story. Pulling hues from the pattern is a wonderful way to create a cohesive look that feels intentional and professionally designed.
- Accent Colors: Use a minor color from the wallpaper for throw pillows, vases, or artwork to tie everything together.
- Neutral Tones: Let the main background color of your wallpaper guide your choice for larger pieces, like a new Bassett sofa or area rug.
- Wood Finishes: Match the warmth or coolness of the pattern with the wood tones of your end tables or dining set.
For a deeper dive into creating a harmonious space, check out our expert's guide to the perfect color palette.
Beyond just the look, opting to wallpaper over an existing layer can offer significant cost savings that free up your budget for the fun part—furnishing. U.S. averages show this method costs $4-7 per square foot, compared to $8-15 for full removal and prep. That’s a potential 45% savings that aligns with our Low Price Promise.
This is especially true for the beautiful pre-1980s homes common in Galax, as it helps prevent plaster damage that can come with aggressive removal. You can learn more about these project-saving statistics and see how the numbers stack up.
Since 1902, our family at Guynn Furniture & Mattress has believed that creating a comfortable home shouldn't be stressful. This is where our value truly shines for our neighbors.
We invite you to bring a sample of your new wallpaper to our showroom. We offer expert design services to help you visualize your space, a huge in-stock selection for immediate gratification, and free in-home delivery and setup within 60 miles to make your vision a reality without the wait.
Common Wallpapering Questions, Answered
Over the years, we’ve heard just about every home project question you can imagine in our showrooms, from Galax to Hillsville. To help you tackle your next room refresh with confidence, we’ve put together answers to the most common questions we get about wallpapering over an existing layer. Think of it as friendly neighborly advice—a tradition we've proudly upheld since 1902.
What Kind of New Wallpaper Is Best for Layering?
That’s a smart question to ask before you start. For the best results, you'll want to choose a high-quality, opaque wallpaper. Heavier, non-woven 'paste-the-wall' types are fantastic here. They’re much more forgiving and won't shrink as they dry, which is a huge help in preventing seams from pulling apart later.
On the flip side, try to steer clear of very thin or light-colored papers, especially if the old wallpaper has a dark or bold pattern. There's a good chance it will show through. If you've already fallen in love with a lighter paper, applying a coat of stain-blocking primer first is non-negotiable—it creates that clean, neutral canvas you need for a professional look.
Can I Use Peel-and-Stick Wallpaper Over Old Wallpaper?
You can, but it comes with a few big warnings. Peel-and-stick wallpaper is picky; it needs a perfectly smooth, non-porous surface to get a good, lasting grip. If your existing wallpaper is a flat, non-textured vinyl, it can work out beautifully after a thorough cleaning and priming.
However, if the old paper has any texture at all—even a subtle one—the peel-and-stick paper won't make full contact. That can lead to it peeling away over time, especially in rooms with fluctuating humidity like bathrooms. It’s generally a much riskier move than using traditional pasted wallpaper for layering.
How Do I Handle Outlets and Switches?
Safety first, always. Before you do anything else, head to your circuit breaker and turn off the electricity to the room you're working in. Once you're sure the power is off, go ahead and unscrew and remove the faceplates from all your outlets and light switches.
Wallpaper right over the openings. After smoothing the paper down, take a sharp utility knife and carefully slice an 'X' from corner to corner across the electrical box. This lets you trim the flaps cleanly around the inside edge of the box for a tidy finish. Wait until the wallpaper is completely dry, and then you can safely screw the faceplates back on.
When Should I Just Hire a Professional Instead?
Knowing when to call in an expert is one of the smartest decisions a homeowner can make. We strongly recommend hiring a professional if you find multiple layers of old wallpaper, if your walls are older plaster showing signs of damage, or if the current wallpaper is peeling or bubbling all over the place.
An expert guarantees a flawless result, which is crucial when you're working with very expensive or intricately patterned paper. If you're on the fence, our expert design staff at Guynn is always here in our no-pressure atmosphere to offer advice on the best path forward for your home.
Ready to find the perfect furniture for your newly wallpapered room? The friendly team at Guynn Furniture & Mattress is here to help you pull the whole look together. We proudly serve our neighbors across Galax, Independence, Hillsville, and the wider Southwestern Virginia / Northern North Carolina region.
Visit our showrooms in Galax, Independence, or Hillsville to test the comfort for yourself.
Schedule a consultation with our design team to start planning your dream room today.
Browse our selection online at guynnfurniture.net.
