How to Weatherproof Outdoor Furniture: Simple Tips for Year-Round Enjoyment
Here in Southwestern Virginia, we know that time spent on the patio with our family is precious. Learning how to keep your outdoor furniture looking its best is a simple process: thoroughly clean each piece, apply a material-specific protectant like a sealant or wax, and let it fully cure before the weather gets to it. This straightforward approach is the key to protecting your investment for years of family gatherings.
Your Guide to Year-Round Outdoor Comfort
Time spent relaxing on your deck or patio is a gift. But the unpredictable weather in our region—from the hot summer sun in Galax to the crisp, damp evenings in Hillsville—can take a real toll on your furniture. Protecting your outdoor investment isn't just a chore; it’s about making sure your favorite spots are always ready for a quiet morning coffee or a lively family barbecue.
Since 1902, our family has helped neighbors create comfortable homes, and that legacy extends to your outdoor living spaces. We believe that with a little care, your furniture can last for many seasons. This guide is built on that experience, offering practical steps to keep your pieces looking beautiful.
Why Weatherproofing Matters
Properly weatherproofing your furniture is more than just a quick cosmetic fix. It provides essential protection that:
- Prevents Damage: It stops wood from cracking, keeps metal from rusting, and prevents fabrics from developing mildew.
- Saves Money: By extending the life of your furniture, you avoid the cost of frequent replacements. Our Low Price Promise ensures you get the best value from the start, and proper care makes that value last even longer.
- Maintains Beauty: It preserves the rich color of wood, the sleek finish of metal, and the vibrant patterns of your cushions.
This visual guide breaks down the core process into three simple stages.
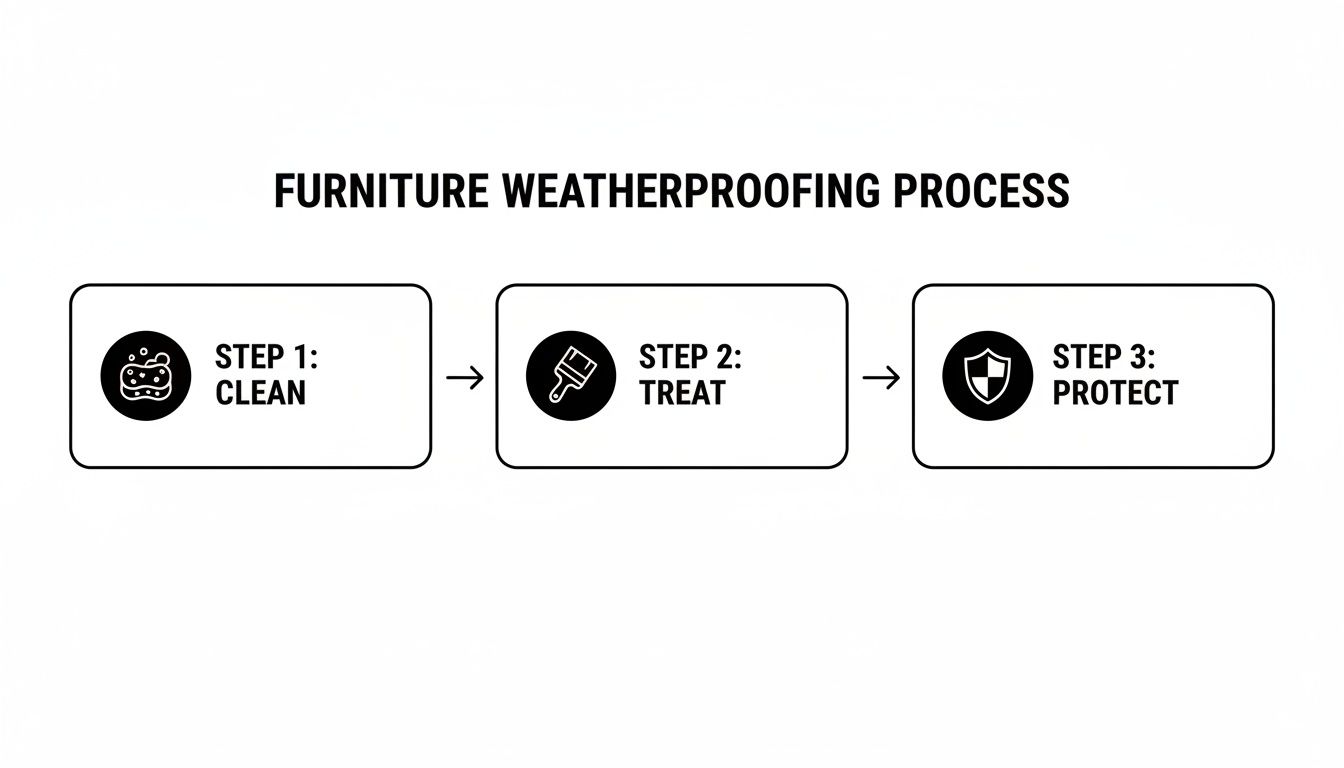
As you can see, a successful weatherproofing project always starts with a clean surface. You can't protect what isn't prepped.
Choosing the Right Pieces from the Start
Of course, the best defense is a good offense. When planning for long-lasting outdoor enjoyment, selecting items made from durable, weather-resistant materials is crucial. Brands like Ashley and Bassett design pieces to withstand the elements, and we keep a large selection in stock for immediate free in-home delivery and setup within 60 miles. You can learn more about finding the perfect foundation for your space in our guide to essential outdoor furniture pieces.
The global outdoor furniture market is projected to reach $81.44 billion by 2032, a clear sign that homeowners everywhere are investing more in creating durable and inviting outdoor spaces. This growth is fueled by advancements in materials designed to extend furniture life.
For a quick reference, here’s a breakdown of the best weatherproofing approach for the most common materials you'll find on your patio.
Quick Guide to Weatherproofing by Furniture Material
| Material Type | Best Weatherproofing Method | Key Benefit |
|---|---|---|
| Wood (Teak, Cedar) | Penetrating oil or marine varnish | Prevents graying, cracking, and water damage |
| Metal (Iron, Steel) | Rust-inhibiting primer and paint/sealant | Stops rust and corrosion in its tracks |
| Wicker/Rattan | Clear sealant or exterior varnish | Keeps fibers from becoming brittle and frayed |
| Fabrics/Cushions | Water-repellent fabric guard spray | Resists moisture, mildew, and UV fading |
This table gives you a great starting point, but we'll dive deeper into the specific steps for each material in the sections below. Remember, the right treatment makes all the difference.
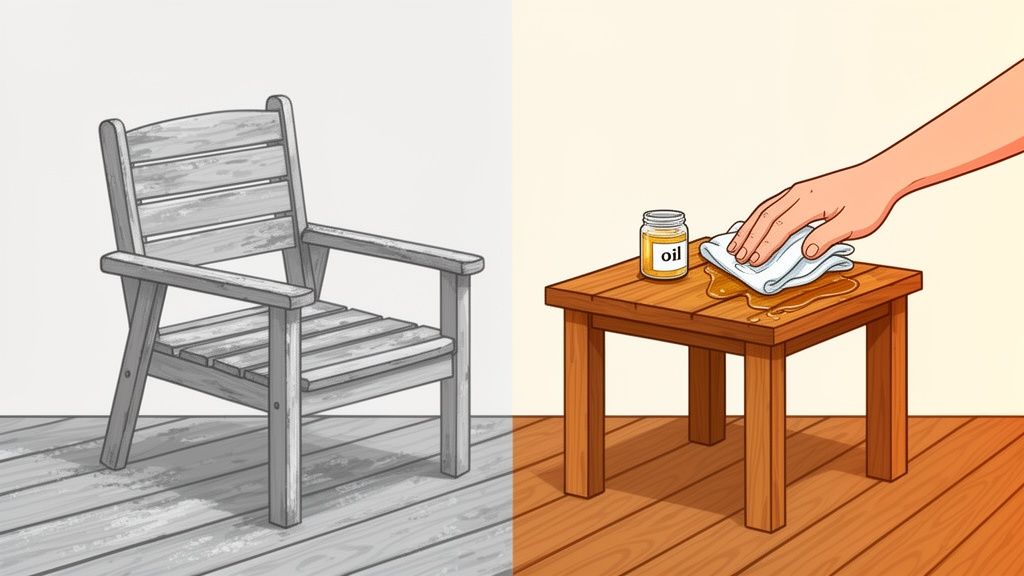
Protecting Wooden Furniture from the Elements
There’s just something special about wooden outdoor furniture. It brings a natural warmth and timeless look to any patio or deck here in Southwestern Virginia. But wood, by its nature, needs a little help to stand up to our humid summers and chilly winters. Without the right care, it can crack, rot, or fade to a dull gray.
Learning how to weatherproof your wooden outdoor furniture is the best way to protect your investment. The good news is that it’s a pretty straightforward process that keeps pieces from brands like Ashley Furniture looking beautiful for years of family get-togethers.
The Essential First Step: Cleaning and Prep
You just can't protect a dirty surface. Before you even think about applying a sealant or oil, a thorough cleaning is non-negotiable. This step gets rid of all the dirt, pollen, and mildew that could get trapped under the new finish and cause damage from the inside out.
Start by mixing a mild soap with warm water. Using a soft-bristle brush, gently scrub the entire surface, paying extra attention to the little nooks and crannies where grime loves to hide. For tougher spots or the first signs of mildew, a simple solution of one part white vinegar to three parts water works wonders.
Once you’ve scrubbed everything down, rinse it completely with a garden hose. It's super important to get all the soap residue off, since anything left behind can mess with the new protective coat. Then, you have to let the furniture dry completely, which can take 24 to 48 hours, depending on the humidity.
A Helpful Neighbor Tip: Don't be tempted to blast your furniture with a pressure washer on its highest setting. It seems like a quick fix, but the intense spray can easily gouge softer woods like pine or cedar, creating a rough surface and doing more harm than good.
Choosing the Right Protective Finish
Once your wooden furniture is clean and bone-dry, it's time to choose its armor. The two main options for weatherproofing are penetrating oils and surface sealants. Each has its own benefits, and the best choice usually depends on the type of wood and the look you’re going for.
Penetrating Oils (Teak, Tung, and Linseed Oil): These oils soak deep into the wood grain, nourishing the fibers from the inside. They are perfect for dense hardwoods like teak because they replenish the wood's natural oils and bring out its rich color. An oil finish gives you a beautiful, natural-looking matte appearance but usually needs to be reapplied once a year.
Sealants (Varnishes and Polyurethane): These products form a hard, protective film on the surface of the wood. A good quality marine varnish, for instance, offers fantastic protection against both moisture and UV rays. Sealants are a great choice for softer woods like pine or cedar, as they create a durable barrier against scratches and water damage. The finish can range from satin to high-gloss and often lasts longer than oil—sometimes up to two or three years.
For some specialized guidance on prepping specific woods, like those beautiful teak pieces, this resource on how to clean teak furniture has some excellent, detailed advice.
Application for a Flawless Finish
With your chosen product in hand, the application technique makes all the difference. Always work in a well-ventilated area—preferably outdoors on a calm, overcast day to avoid direct sunlight, which can make the finish dry too quickly and look splotchy.
Using a natural-bristle brush for oil-based finishes or a synthetic one for water-based products, apply a thin, even coat. Always brush in the direction of the wood grain to make sure the product absorbs properly and looks smooth. The goal is to apply just enough to cover the surface without letting it pool or drip.
For many pieces, one coat is plenty, but for older, thirstier wood, a second coat might be needed. If so, make sure you follow the manufacturer's instructions for drying time between coats. That's a step you definitely don't want to rush.
Curing and Long-Term Care
After the final coat is on, the waiting game begins. The curing process is when the finish hardens completely to form its protective shield. This can take anywhere from a few days to a full week. During this time, it’s best to keep the furniture in a covered spot like a garage or porch, safe from rain, dew, and falling leaves.
Protecting wood furniture isn’t a one-and-done job. For more insights on safeguarding all your pieces, check out our ultimate guide to protecting wood furniture from scratches and stains. With a little seasonal attention, your wooden outdoor furniture will be a cherished part of your home for a long, long time.
Shielding Metal Furniture from Rust and Corrosion
Metal furniture brings a wonderful sense of durability and sleek style to any outdoor space, whether it's a classic wrought iron bistro set or a modern aluminum dining table. But let's be honest, our humid Southwestern Virginia summers can be tough on metal. That moisture in the air is the number one enemy, often leading to stubborn rust on iron and steel or unsightly pitting on aluminum pieces.
The good news? Protecting your metal furniture is completely manageable. With a little attention before the season gets underway, you can stop corrosion in its tracks and keep those pieces looking fantastic for years to come. This isn't just about looks; it's about preserving the structural integrity of your furniture, including favorites from trusted brands like Bassett.
Starting with a Clean Slate
Just like with wood, you can't protect a dirty surface. First thing's first: give your metal furniture a good wash with mild detergent and warm water. A simple sponge or soft cloth is all you need to wipe away the season's accumulation of dirt, pollen, and bird droppings.
After washing, rinse every surface thoroughly with a garden hose to get rid of any soap residue. Then, let the furniture dry completely in the sun. This is a critical step—don't rush it. Trapped moisture is what causes problems in the first place, so patience here is key.
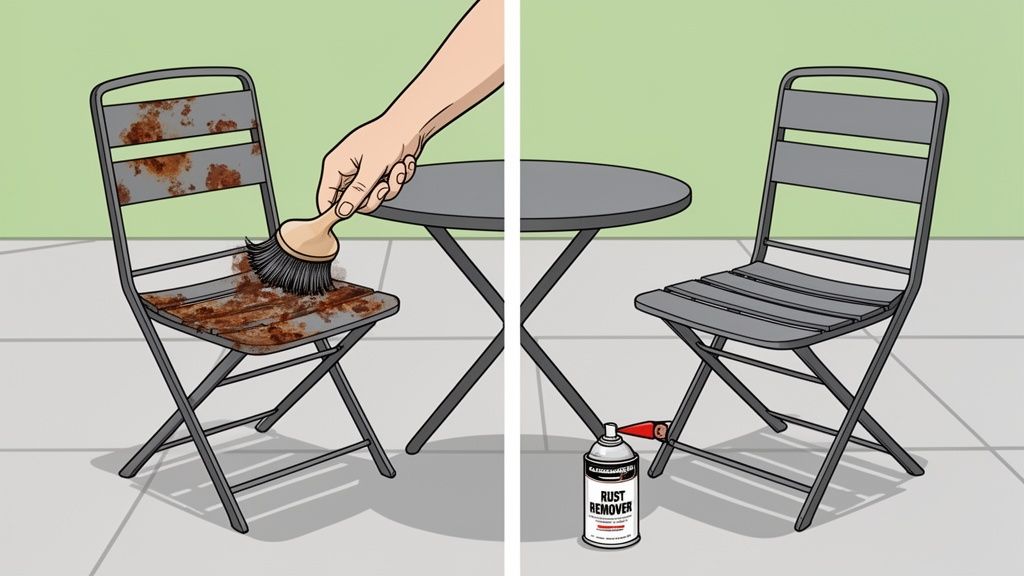
Tackling Existing Rust Spots
If you see any rust, jump on it immediately before it spreads. For smaller issues, you might not even need to head to the hardware store.
- For light rust: A crumpled-up ball of aluminum foil dipped in water can work wonders. A paste made of baking soda and water, gently scrubbed on the spot, is another great trick.
- For more stubborn rust: This is where a wire brush or fine-grit sandpaper becomes your best friend. Gently sand the rusted area until you’re back to the bare metal.
Your goal is to create a perfectly smooth, clean surface so the new protective coating can properly adhere. Once the rust is gone, wipe the area clean with a dry cloth to get rid of any lingering dust or particles.
Our Pro Tip: When you're sanding, always wear safety glasses and a mask. It's a small, easy step to protect yourself from flying particles and dust, keeping your DIY project safe and enjoyable.
Choosing the Right Protective Coating
With your metal furniture clean and rust-free, it’s time to apply that protective barrier. The right product really depends on the type of metal you're working with.
- Paste Wax: For aluminum or powder-coated metal that's still in good shape, a simple coat of automotive paste wax works beautifully. It creates a fantastic barrier against moisture and gives the furniture a nice shine. Just apply it with a soft cloth. You'll probably want to reapply it once or twice a season.
- Rust-Inhibiting Paint: For wrought iron or steel, especially after you've removed rust, a direct-to-metal paint is the best long-term fix. These paints act as both a primer and a topcoat, sealing the metal completely from air and moisture. They come in spray cans, which are great for intricate designs, or in traditional cans if you prefer brushing it on larger, flat surfaces.
Applying a fresh coat of paint not only protects your furniture but also gives you a chance to refresh its entire look. You can stick with a classic black or get creative with a bold new color—it’s an easy way to update your patio's style. For more ideas on how to incorporate these durable materials, you might be interested in our article on what you should know about metal accents.
With just a little bit of seasonal care, your metal outdoor furniture will remain a sturdy and stylish part of your outdoor living area, ready for every gathering from Hillsville to Independence.
Preserving the Charm of Wicker and Rattan
There’s just something about wicker and rattan furniture. It creates a cozy, relaxed feel that’s perfect for our porches and patios here in Southwestern Virginia and across Northern North Carolina. But the very thing that gives it that beautiful woven charm is also its biggest weakness against the weather.
Natural wicker and rattan are incredibly vulnerable to moisture and sun. If left unprotected, those woven fibers will soak up rain, leading straight to mold, mildew, and eventually, rot. At the same time, the sun's harsh UV rays will dry them out, making them brittle, faded, and prone to cracking. Knowing how to properly weatherproof this type of furniture is the only way to keep it from falling apart.
A Gentle but Thorough Cleaning
Your first step is a deep, yet gentle, cleaning. Those intricate weaves are magnets for dust, pollen, and dirt. If you let that grime sit, it holds moisture against the fibers—exactly what you’re trying to prevent.
Start by using the soft brush attachment on your vacuum to get all the loose debris out from between the weaves. Next, mix up a simple solution of a few drops of mild dish soap in a bucket of warm water. Dip a soft cloth into the soapy water, wring it out really well so it’s just damp, and carefully wipe down the entire piece.
For stubborn grime or the beginnings of mildew, a solution of one part white vinegar to four parts water works wonders. Use a soft-bristled brush (an old toothbrush is perfect for tight spots) to gently scrub the affected areas.
Once you’re done cleaning, grab a clean, damp cloth to "rinse" the furniture by wiping away any soap residue. The final, crucial part is letting it air dry completely, ideally in a shaded, breezy spot. Never rush this step; sealing over damp fibers will trap moisture inside and cause more damage than it prevents.
Choosing the Right Sealant
After your wicker or rattan is clean and bone-dry, it's time to add a protective coat. The right product depends on whether your furniture is made from natural fibers (like classic rattan or bamboo) or synthetic, all-weather resin.
For Natural Wicker: You’ll want a clear marine varnish or an exterior-grade polyurethane that contains UV inhibitors. These create a tough, waterproof barrier that locks out moisture and shields against sun fading. Some people like a tung oil finish for a more natural look, but it usually requires more frequent reapplication to stay effective.
For Synthetic Resin Wicker: All-weather wicker is already built to be more durable, but an extra layer of protection never hurts. A quick coat of automotive paste wax is a great trick—it boosts its resistance to UV rays and helps water bead right off the surface, keeping it looking brand new.
No matter what you choose, always test it on a small, hidden spot first to make sure you’re happy with the final look.
Proper Application and Maintenance
Applying the sealant is pretty straightforward. Using a natural-bristle paintbrush, brush on a thin, even layer of your varnish or sealer. Work your way from top to bottom, being careful to get into all the woven details without letting the product pool or drip.
Let that first coat dry completely, following the manufacturer's instructions. A second thin coat is almost always a good idea for maximum protection. After the final coat, you need to let the piece cure for at least 24 to 48 hours in a dry, covered place before you put it back out in the elements.
This simple annual routine will ensure your beautiful wicker pieces stay comfortable and stylish for many seasons to come. For more inspiration on creating your perfect outdoor retreat, check out our guide to deck decorating ideas.
Keeping Your Outdoor Fabrics and Cushions Vibrant
The heart and soul of outdoor comfort? It’s almost always the plush cushions and inviting fabrics. From a comfy La-Z-Boy ottoman to the pillows on an Ashley sofa, these textiles are what turn a simple patio set into a genuine outdoor living room. But the very things we love about our Southwestern Virginia seasons—bright sun and refreshing rain—are the biggest threats to these soft surfaces.
Without the right care, fabrics can quickly fade under harsh UV rays, and any trapped moisture creates the perfect breeding ground for stubborn, unsightly mold and mildew. Learning how to properly weatherproof your outdoor fabrics is the key to keeping your furniture fresh, vibrant, and ready for every family get-together. The goal is simple: create a barrier that repels water and resists sun damage, so your cushions stay as colorful and comfortable as the day you brought them home.
The Foundation of Fabric Care: Regular Cleaning
First things first: the most important step in protecting your outdoor fabrics is simply keeping them clean. Dirt, pollen, bird droppings, and spilled drinks don't just look bad; they actively break down fabric fibers and create a food source for mildew. A simple, regular cleaning routine is your best line of defense.
Most of the time, all you'll need is a soft brush to sweep away any loose debris. For a deeper clean, mix a small amount of mild soap with lukewarm water. Use a sponge or soft cloth to gently wipe down the cushions, then give them a thorough rinse with a garden hose.
A Helpful Neighbor Tip: Always, always let your cushions air dry completely before putting them back on the furniture or into storage. I like to prop them up on their sides so water can drain out easily, and I flip them occasionally to make sure every part gets dry. This one simple trick is one of the most effective ways to prevent mildew from ever getting a foothold deep inside the cushion.
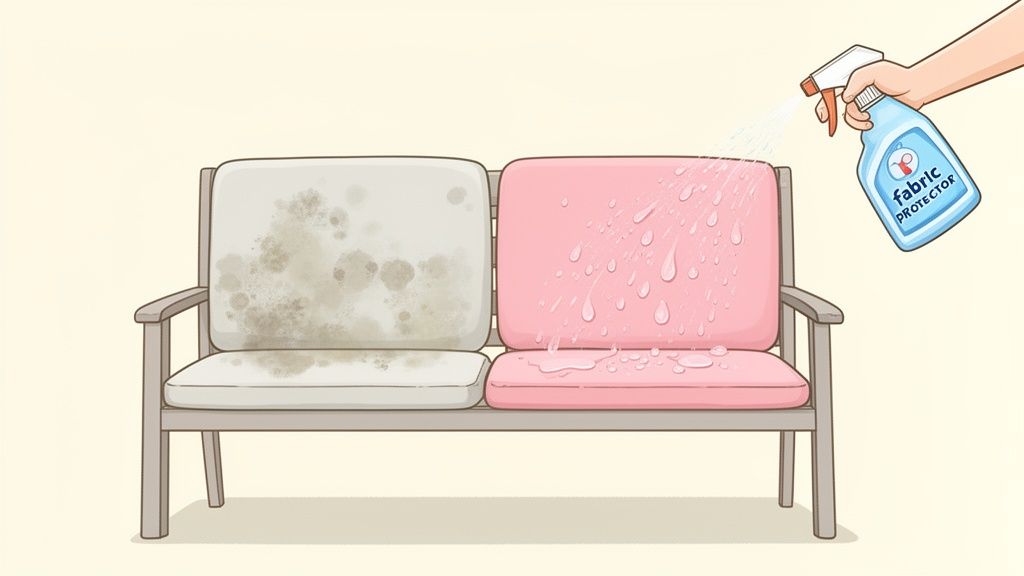
Applying a Fabric Protector Spray
Once your cushions are clean and bone-dry, it's time to add a powerful layer of protection. A high-quality fabric protector spray is an absolute must-have for any outdoor textile. These sprays work by creating an invisible shield on the surface of the fabric, causing water to bead up and roll right off instead of soaking in.
Here’s how to get the best results:
- Work in a Ventilated Area: This is a non-negotiable. Always apply these sprays outdoors on a calm, non-windy day.
- Spray Evenly: Hold the can about six to eight inches from the fabric. Use a light, sweeping motion and slightly overlap each pass to ensure you get full coverage.
- Don't Oversaturate: A light, even coat is far more effective than a single heavy one. Piling on too much product can leave the fabric feeling stiff and unpleasant.
- Let It Cure: This is critical. Allow the fabric to dry completely according to the manufacturer’s instructions before it gets wet. That curing time is what allows the protective barrier to form properly.
Making a habit of reapplying this spray at the beginning of each season is a fantastic move. It renews that protective coating and keeps your fabrics ready for whatever the weather decides to throw their way.
Understanding High-Performance Outdoor Fabrics
The furniture industry has made some incredible strides in developing ultra-durable textiles. In fact, the global outdoor fabric market was valued at a staggering $13.41 billion in 2024, which just goes to show how much innovation is happening in creating materials that can truly stand up to the elements. You can see more on these industry trends over at Grand View Research.
When you're shopping for new or replacement cushions, be sure to look for fabrics specifically engineered for outdoor use. Materials like solution-dyed acrylics are the champions of durability. Why? Because the color pigment is added to the fiber during its creation, not just printed on the surface. This means the color runs all the way through, making it incredibly resistant to fading from UV exposure. For a deeper dive into what makes different materials tick, check out our guide on everything you need to know about upholstery materials.
With just a little routine cleaning and a seasonal protective spray, your outdoor cushions and fabrics will remain a beautiful and comfortable part of your outdoor sanctuary for many years to come.
A Practical Seasonal Maintenance Checklist
Learning how to weatherproof outdoor furniture is more of a marathon than a sprint. A little attention at the beginning and end of each season is the secret to keeping your pieces looking great year after year. Think of it as a simple routine that protects your investment and ensures your patio is always ready for family and friends.
A consistent maintenance schedule prevents small issues—like a loose bolt or a tiny rust spot—from turning into big problems. By staying on top of it, you extend the life of your furniture and save yourself from costly repairs or replacements down the line. It's a small commitment for a huge return in longevity and beauty.
Your Spring Kick-Off Checklist
As the weather warms up here in Southwestern Virginia, it's time to bring your outdoor space back to life. This is the moment to inspect everything and get it ready for months of enjoyment.
- A Thorough Inspection: Give every piece a once-over. Check for any wobbly legs on chairs, loose screws on tables, or new chips in the paint on metal furniture. Tighten any hardware and touch up any nicks before they can get worse.
- The Big Clean: Give everything a good wash based on its material. This removes all the dust and grime that accumulated during the off-season.
- Reapply Protection: Now is the perfect time to reapply a coat of sealant to wood, a layer of paste wax to metal, or a fresh fabric guard spray to your cushions. This single step will set your furniture up for success all summer long.
Your Fall Wind-Down Routine
When the air gets crisp and you're spending less time outdoors, it's time to prep your furniture for the colder, wetter months ahead. This is arguably the most important part of your annual maintenance.
First, give everything another deep clean to remove summer's dirt and any new stains. You never want to store dirty furniture, as this can lead to mildew and permanent damage. Make sure every single piece, especially cushions, is 100% dry before you even think about storing it.
Storing your furniture for the winter is the best way to protect it. A dry garage, shed, or basement is ideal. If that's not possible, invest in high-quality, breathable covers that fit well. A snug fit prevents water from pooling and keeps pests out.
This seasonal care is especially important considering the strong patio culture in our country. Retail sales of outdoor furniture are expected to climb to $21.3 billion by 2028, as more families invest in their outdoor living spaces. Taking care of what you have ensures you're not part of the replacement cycle every few years. You can discover more about these market trends and see why protecting your investment is so valuable.
Common Questions About Outdoor Furniture Care
As your neighbors in the Galax, Independence, and Hillsville areas, we hear a lot of the same great questions about keeping outdoor furniture looking its best. We’ve been helping families with their homes since 1902, so we're happy to share what we've learned about how to weatherproof outdoor furniture.
How Often Should I Reapply Protector?
This is a great question, and the answer really depends on the material and your climate.
As a general rule, we recommend a yearly application for most sealants and protectors. But for wood furniture that gets hit with a lot of direct sun and heavy rain, you'll want to check the finish every six months or so.
A simple test is to just flick some water on the surface. If it beads up nicely, you’re still protected. If the water soaks in, it’s time for a fresh coat. For fabric protector sprays on cushions, like those on a comfortable La-Z-Boy piece, a quick reapplication at the start of each season is your best bet.
Can I Use Indoor Paint on Outdoor Metal Furniture?
We really advise against this. It might seem like a quick fix, but indoor paints just don't have the right stuff to fight off moisture, UV rays, and big temperature swings.
Using a proper exterior-grade, rust-inhibiting paint is the only way to give your metal furniture the durable protection it needs to prevent rust and corrosion. It's an extra step that pays off for years.
What Is the Best Way to Clean Mildew?
Mildew is a common problem, but it's usually easy to handle if you catch it early.
For most mild cases, a simple solution of one part white vinegar to three parts water works wonders. Just spray it on, give it a gentle scrub with a soft brush, and rinse everything off completely. If you’re dealing with more stubborn mildew, it’s worth looking for a commercial cleaner specifically designed for outdoor fabrics to get the job done right.
At Guynn Furniture & Mattress, our expert design staff, including Debra Williams, can help you visualize your space, choose beautiful, durable pieces, and show you exactly how to care for them. We pride ourselves on creating a no-pressure atmosphere where you can find exactly what your home needs.
Visit our showrooms in Galax, Independence, or Hillsville to test the comfort for yourself. Schedule a consultation with our design team to start planning your dream room today. Or, you can always browse our selection online at guynnfurniture.net.